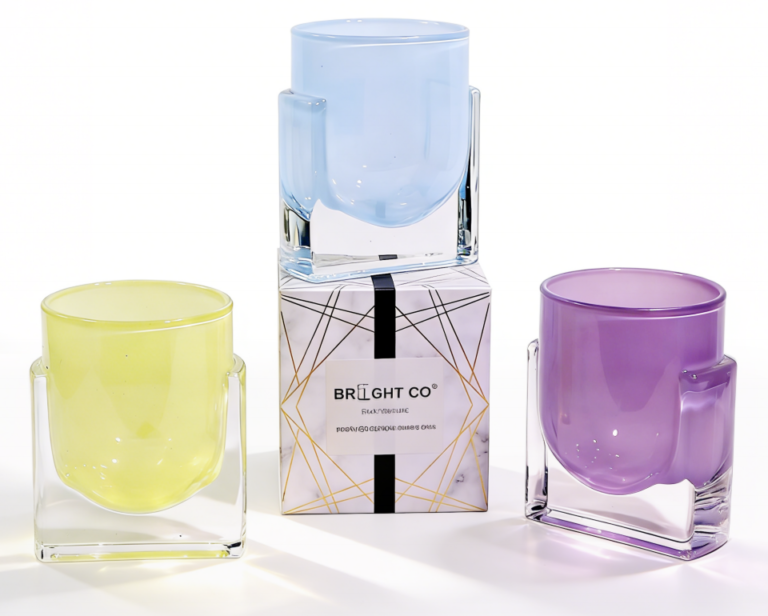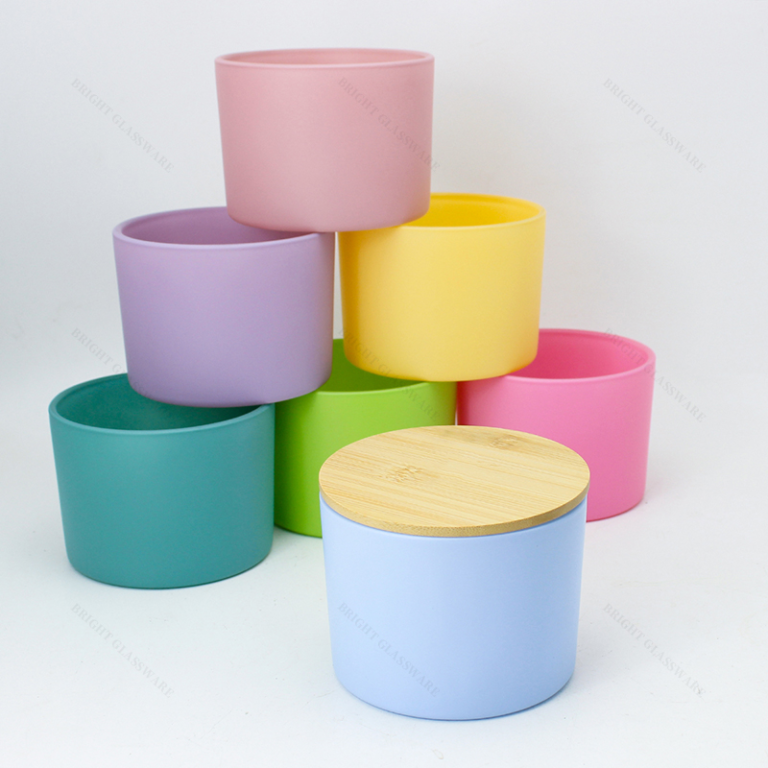

Struggling with crooked, bubbling, or peeling labels on your candle jars? It’s a frustrating problem that undermines all the effort you put into developing your unique fragrances and brand identity. You’re left with a product that looks cheap and unprofessional, hurting customer perception and sales. The solution lies in understanding that a perfect label is less about the sticker itself and more about the quality of the glass it’s applied to. Learning how to label candle jars correctly starts with the jar's dimensions, surface quality, and a thoughtful approach to your artwork.
A successful candle label application depends on three factors: accurately measuring the usable label area on a dimensionally consistent jar, choosing a material compatible with the glass surface quality, and preparing precise artwork for either a sticker or direct-to-glass printing. This ensures a flawless, professional finish that enhances brand value.
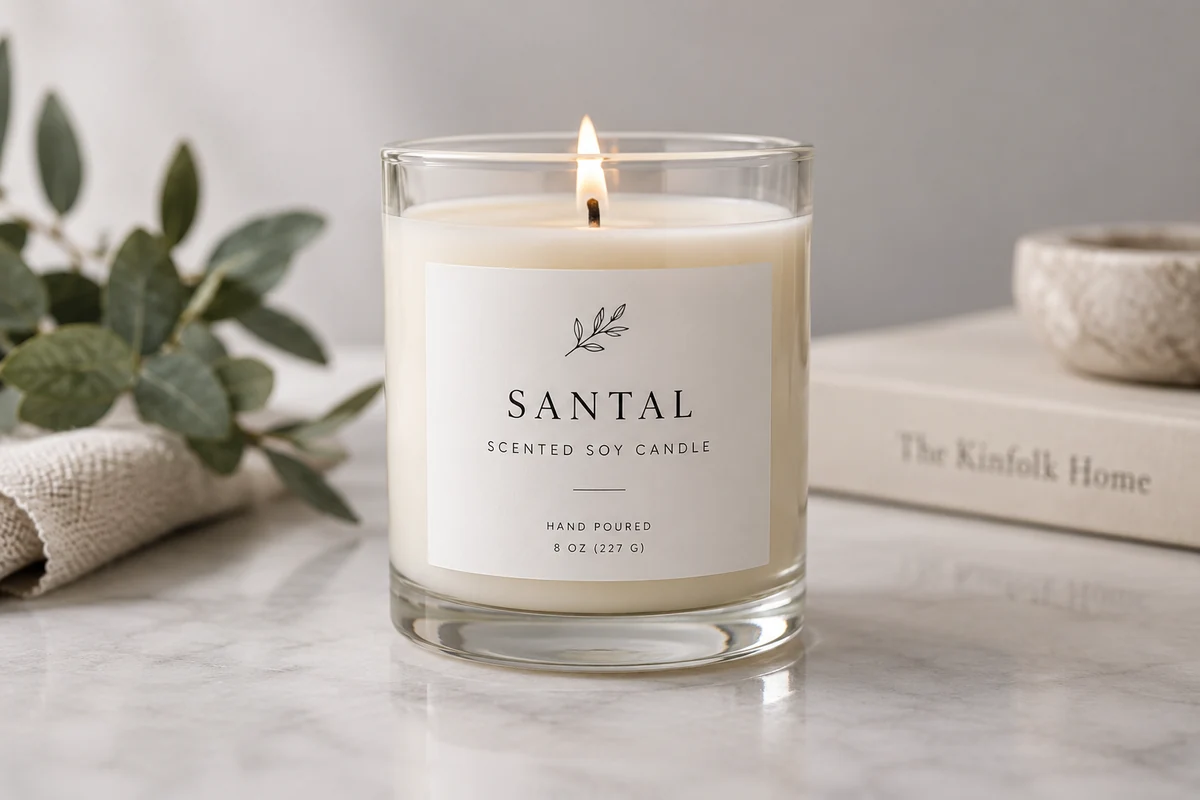
Getting the label right is a game of precision, where millimeters matter. Beyond just the design, you need to consider the physical realities of the jar itself and how it will behave during both automated labeling and its end use. Let's explore the critical steps to ensure your candle's packaging looks as good as its fragrance smells.
Measure the Usable Label Area?
Have you ever ordered a thousand labels only to find they’re slightly too tall or don’t wrap around correctly? This costly mistake often comes from guessing the size or using a generic template. When labels don't fit the jar's specific geometry, you're guaranteed to face application issues.
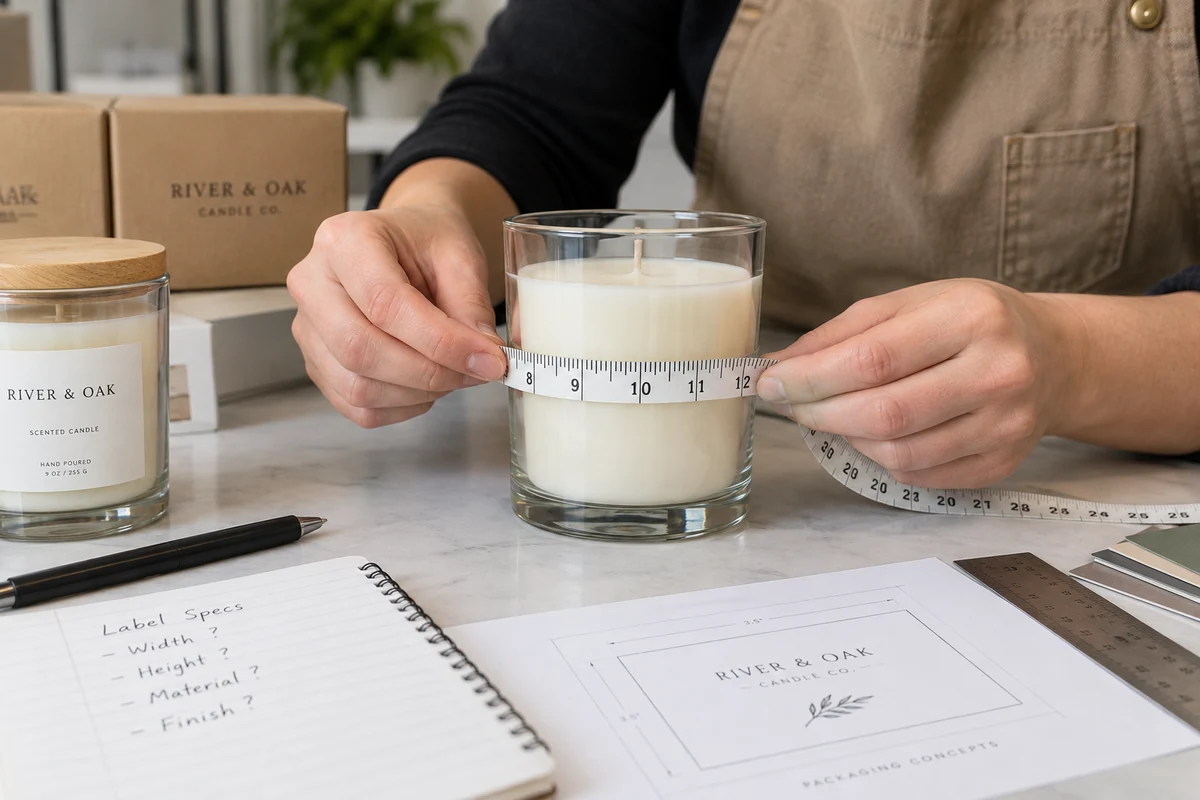
To avoid this, you must meticulously measure the height and circumference of the flat, "label-friendly" portion of your specific candle jar. Never assume all jars of the same volume have the same dimensions.
Dive Deeper
The most critical factor in successful labeling, especially for automated production lines, is the geometry and dimensional consistency of the jar itself.
Why Straight-Sided Jars Are the Industry Standard1
In my experience working with global brands, there's a reason so many gravitate towards classic straight-sided round jars, like our BGC7080 and BGC8090 models. The answer is simple: automated labeling machines have no tolerance for error. If a jar has even a slight taper (where the top and bottom diameters differ), a rectangular label will inevitably be applied crookedly or develop wrinkles and bubbles as the machine tries to wrap it around a conical surface.
A straight-sided design provides a perfectly vertical surface, which is the most forgiving and reliable shape for high-speed automated label applicators.
The Critical Role of Dimensional Consistency
Even with a straight-sided design, inconsistency between jars can derail production. If one jar's diameter is 70mm and the next is 70.8mm, your labeling machine's settings will be wrong for one of them. This is a common issue with low-cost glass where quality control is lax.
At Bright Glassware, we use automated infrared inspection and caliper checks to ensure the diameter tolerances of our jars are controlled within fractions of a millimeter. This extreme dimensional consistency is what allows your production line to run smoothly, placing every single label in the exact same position on every single jar.
How to Measure Your Jar:
- Label Height: Use a rigid ruler or calipers. Measure only the flat, vertical wall of the jar. Do not include any curved parts at the shoulder (top) or heel (bottom).
- Label Width (Circumference): Use a flexible sewing tape measure. Wrap it snugly around the jar to get the full circumference.
- Calculate Your Safe Area: Subtract at least 1/8 inch (or 3mm) from the height measurement to create a pleasing margin from the top and bottom curves. For the width, decide if you want a gap between the label edges (subtract about 1/4 inch or 6mm from the circumference) or a slight overlap.
Always get a physical sample of the jar you intend to use and perform these measurements yourself before committing to a label order.
Choose and Test the Label Material?
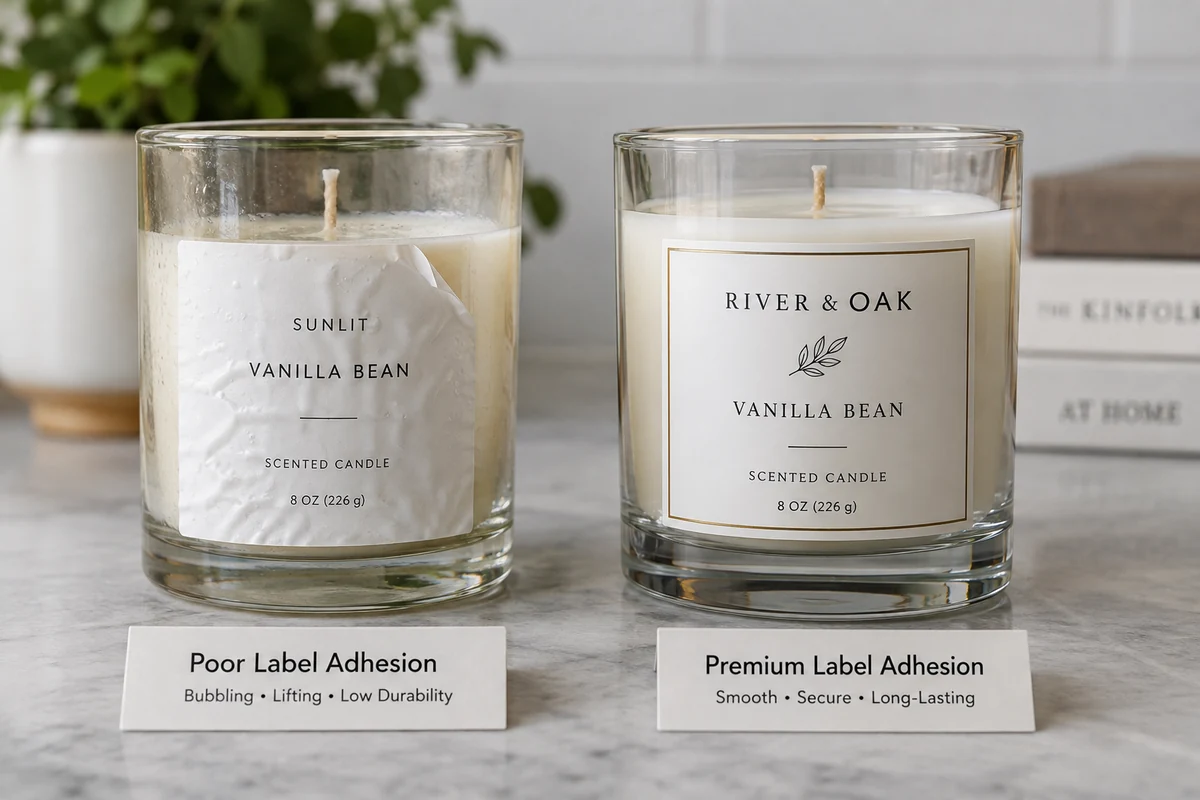
You’ve applied a beautiful clear label, but now there are ugly cloudy spots underneath. Or worse, after the first burn, the edges of your paper label start to curl and peel away from the heat. These issues signal a mismatch between your label adhesive and the glass surface.
The solution is to select and rigorously test a label material and adhesive combination that is proven to work with your specific glass jar's surface texture and can withstand the heat cycles of a burning candle.
Dive Deeper
The flawless application of a label is ultimately determined by the microscopic quality of the glass surface it adheres to.
The Hidden Enemies: Mold Seams and Chill Marks2
You might think your glass jar's surface is perfectly flat, but to an adhesive film, it can be a minefield. Low-cost glass manufacturing often produces noticeable imperfections:
- Mold Seams: A raised line where the two halves of the glass mold meet. A label applied over this will always show a slight bump or an air channel.
- Chill Marks (Waviness): Ripples or uneven texture on the glass surface caused by poor temperature control during manufacturing. When a label is applied over these "waves," it creates trapped air pockets that form unsightly bubbles, which are impossible to squeegee out.
From a procurement perspective, a supplier's ability to minimize these defects is a primary indicator of their quality.
The Importance of a Flawless Glass Surface
For our premium high-flint and super-flint glass jars3, we guarantee an "optical-grade" surface. This means we've eliminated visible mold marks and ensure the glass wall has zero "waviness." This mirror-like smoothness allows the label's adhesive to form a complete, vacuum-tight bond with the glass. This tight seal is what prevents bubbles from forming and, crucially, stops the label from peeling or curling when the jar heats up during burning.
Material & Adhesion Checklist: When evaluating label materials for your candle jars, consider this:
- Material Type: Paper (matte, gloss, textured), White BOPP (polypropylene, waterproof), or Clear BOPP ("no-label look").
- Adhesive: Is it rated for high temperatures? Is it aggressive enough for a textured or frosted surface?
- Testing Protocol: Always test samples on your actual jars.
- Application Test: Does it apply smoothly without bubbles?
- Heat Test: Burn a candle in the jar. Does the label peel, discolor, or bubble?
- Durability Test: For fragrance or bath products, splash it with water and oil. Does it hold up?
Prepare Artwork and a Positioning Proof?
Your brand's logo looks crisp and vibrant on screen, but on the final labeled candle, the colors are dull and the text is fuzzy. This disconnect between design and reality can cripple a product launch. It happens when artwork isn't properly prepared for print or when positioning isn't confirmed.
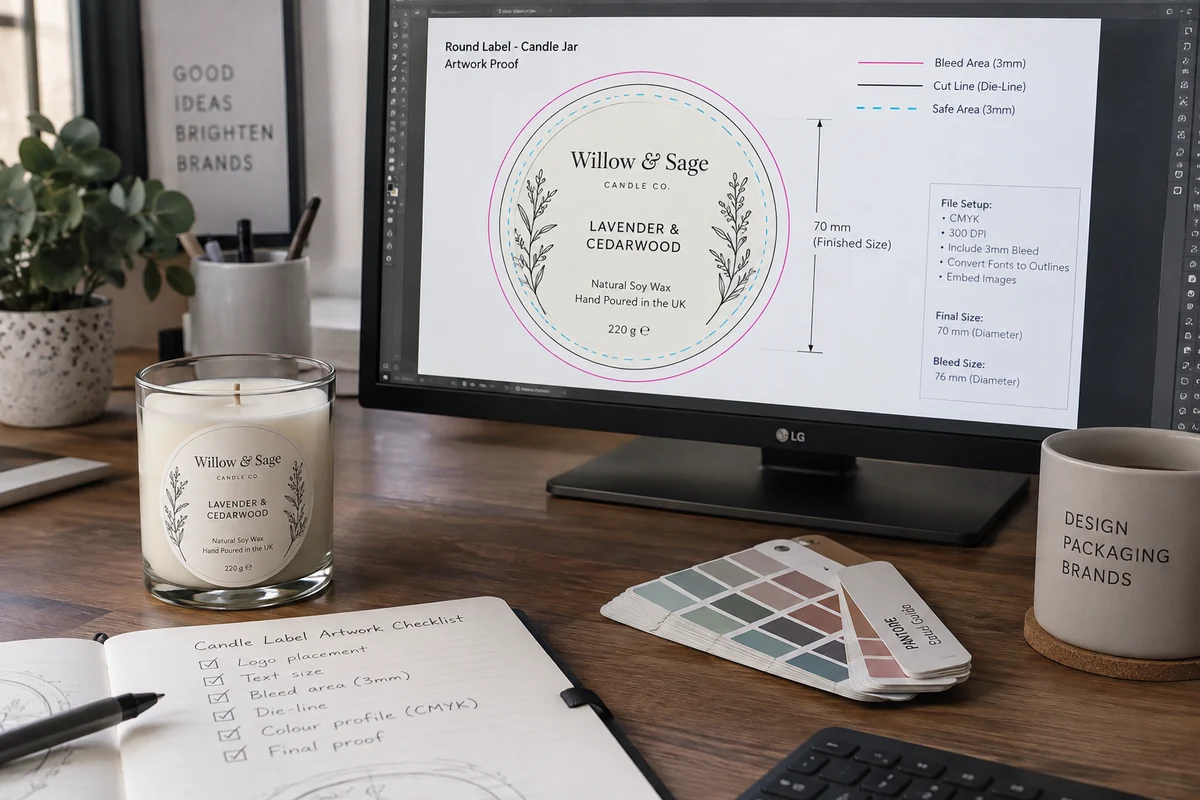
To guarantee a perfect result, you must provide your supplier with print-ready vector artwork and always request a "die-line" proof to confirm the exact size, shape, and placement of the label before any mass production begins.
Dive Deeper
While a great label is a start, I often advise clients who are serious about building a luxury brand to think beyond the sticker. The ultimate expression of quality is integrating the artwork directly onto the glass.
Artwork Checklist for Standard Labels
If using traditional labels, ensuring technical precision in your design files is non-negotiable.
- File Format: Always provide artwork in a vector format (e.g.,
.ai,.eps,.pdf). This allows it to be scaled without losing quality. - Color Mode: Use CMYK for full-color printing4 or specify Pantone (PMS) color codes for precise color matching.
- Outline Fonts: Convert all text to outlines or shapes to prevent font substitution errors.
- Resolution: If your design includes any raster images (like a photo), ensure they are at least 300 DPI at the final print size.
- Bleed: Your printer will require a "bleed," an extra 1/8 inch (3mm) of background color or imagery that extends beyond the final cut line of the label.
Beyond the Sticker: The Luxury of Direct-to-Glass Printing
For our top-tier clients, including those we serve as an authorized supplier for brands like BVLGARI, the conversation shifts from paper quality to "de-stickerization5." Why worry about paper labels that can get scratched, peel in a humid bathroom, or feel cheap to the touch?
At Bright Glassware, our automated, dust-free decoration workshops can "tattoo" your artwork directly onto the glass.
- Silk-Screen Printing6: Perfect for solid logos and text, creating a tactile, slightly raised effect that is permanently fused to the glass at high temperatures.
- Hot Stamping7: This process applies real gold, silver, or colored foils to create a brilliant, metallic finish that’s impossible to replicate with ink.
These finishes are incredibly durable and pass rigorous cross-cut and alcohol-rub tests. Imagine a customer picking up your candle. Instead of feeling a paper sticker, their fingers glide over a crisp, metallic, hot-stamped logo on a heavy-base glass jar. This sensory experience conveys luxury and can directly justify a higher retail price. It's an investment in brand equity.
Validate the Finished Jar and Information?
Your beautifully labeled jars leave the factory looking perfect, but they arrive at your warehouse or distribution center scuffed and scratched. The friction from thousands of miles of transit has damaged the very "visual asset" you worked so hard to create.
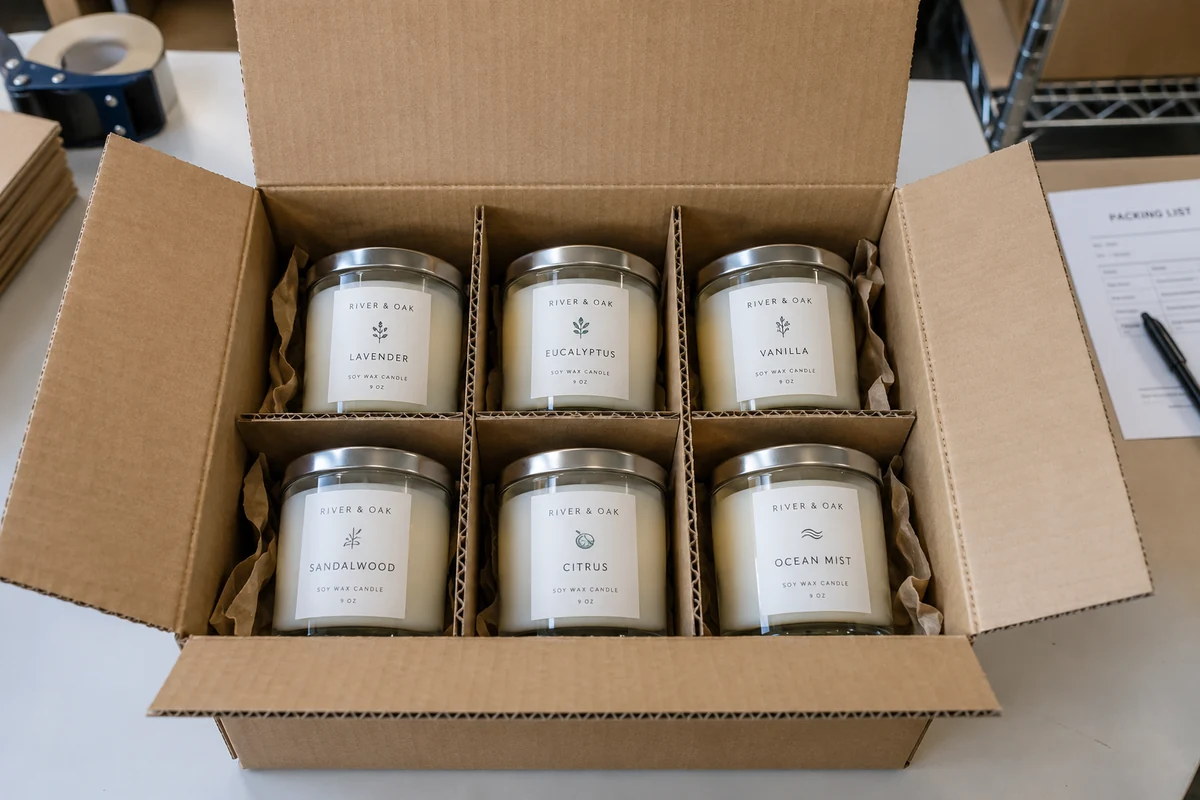
The final step in how to label candle jars is to validate not only the finished product but also the packaging used to transport it. Ensure your supplier uses robust, individual-cell packaging to prevent any friction damage during shipping.
Dive Deeper
The journey from the factory floor to a retail shelf is a hazardous one for a glass product. Protecting the finish is the final, crucial quality control gate.
The Final Product QC Checklist
Before your goods are packed for shipping, a final inspection of the labeled jars should confirm:
- Label Alignment: Is it straight and positioned correctly on every jar?
- Application Quality: Are there any bubbles, wrinkles, or peeling edges?
- Artwork Accuracy: Are the colors, text, and graphics correct as per the approved proof?
- Regulatory Information: Is all required information present and legible (e.g., net weight, warning labels)?
Protecting Your Visual Assets During Shipping
If you've invested in premium labels or expensive direct-to-glass printing, friction during transit is your biggest enemy. We’ve seen entire shipments ruined because a supplier used cheap, loose netting that allowed jars to rub against each other.
To prevent this, we use what we call "Retail-Ready" matrix-style cartons that meet Costco-level inspection standards8. Each candle jar is locked into its own individual cell by high-strength corrugated cardboard or EPE foam dividers. This system ensures that even during turbulent sea freight journeys across the globe, there is zero physical contact between the jars. When you open the box, every single unit is pristine—a perfect work of art, ready for the shelf. When evaluating suppliers, always ask to see their export packaging. It's the last line of defense for your brand's image.
Frequently Asked Questions
What size label should I use for an 8 oz candle jar?
There is no single standard size, as "8 oz" jars come in various heights and diameters. To find the right size, you must measure the specific jar you are using. Measure the height of the flat side-wall and its full circumference with a flexible tape, then subtract a small margin (e.g., 1/8 inch or 3mm) to determine your maximum label area.
Can I use a clear label on a frosted glass jar?
Yes, this is a popular choice that creates a subtle, high-end "etched" or "no-label" look. However, the quality of the adhesive is critical. A poor-quality adhesive on a frosted surface can create a cloudy or "wet" appearance. It is essential to test samples of your clear label on your frosted jar to ensure the adhesive dries perfectly transparent.
Does the net weight on the label include the weight of the jar?
No. The "Net Weight" (Net Wt.) legally refers only to the weight of the consumable product inside the package. For a candle, this is the weight of the wax and any fragrance oils combined. The weight of the glass jar, lid, and wick is considered the "tare weight" and is not included in the net weight statement.
Conclusion
A perfect label on a candle jar is the result of a technical partnership between your design and the physical reality of the glass container. Learning how to label candle jars effectively is a masterclass in details, where success is built on a foundation of微-millimeter dimensional tolerances, an optically pure glass surface, and a strategic choice between high-quality stickers and luxurious direct-to-glass printing. Don’t let a bubbly, crooked label undermine the quality of the fragrance you’ve worked so hard to perfect. Whether you need dimensionally precise jars to feed your automated labeling line or you’re ready to elevate your brand by eliminating labels entirely with our dust-free hot stamping process, Bright Glassware has the international-standard industrial solution ready for you.
Bring your artwork to our engineering team, and let's work together to permanently engrave your brand's vision into crystal-clear glass.
"Everything You Need to Know About Jars", https://www.containerandpackaging.com/resources/everything-you-need-to-know-about-jars/?srsltid=AU7gw4WNy8EK_AL-aVdbQUyg4svuIN_O53rWAMcXyJCzBge26pEaQy87. Research on automated labeling systems indicates that straight-sided jars reduce application errors compared to tapered or irregular shapes due to their consistent vertical surface geometry. Evidence role: general_support; source type: research. Supports: Straight-sided jars are preferred for automated labeling due to their vertical surface, which minimizes errors.. Scope note: The preference may vary depending on the specific labeling machine or industry requirements. ↩
"Bottle Body Characteristics & Mold Seams", https://secure-sha.org/bottle/body.htm. Studies on glass manufacturing defects show that mold seams and chill marks can interfere with adhesive bonding, leading to bubbles and peeling. Evidence role: mechanism; source type: research. Supports: Mold seams and chill marks can disrupt label adhesion by creating uneven surfaces.. Scope note: The impact may depend on the severity of the imperfections and the adhesive used. ↩
"Flint glass", https://en.wikipedia.org/wiki/Flint_glass. Research on glass types highlights that high-flint and super-flint glass offer enhanced clarity and surface smoothness, making them ideal for premium labeling applications. Evidence role: general_support; source type: research. Supports: High-flint and super-flint glass are known for their superior clarity and smooth surface, which enhance label adhesion.. Scope note: The benefits may depend on the specific manufacturing process and application method. ↩
"CMYK color model", https://en.wikipedia.org/wiki/CMYK_color_model. Educational resources on printing technology explain that CMYK is optimized for physical media, making it the standard for full-color printing. Evidence role: definition; source type: education. Supports: CMYK is the standard color mode for full-color printing due to its ability to reproduce a wide range of colors on physical media.. Scope note: The effectiveness of CMYK may vary depending on the printing process and substrate. ↩
"Designing with Direct-to-Glass Digital Printing", https://www.generalglass.com/designing-with-direct-to-glass-digital-printing-combine-function-and-design-to-take-your-building-envelope-to-the-next-level/. Research on branding techniques suggests that direct-to-glass printing offers superior durability and a premium aesthetic compared to traditional labels. Evidence role: general_support; source type: research. Supports: Direct-to-glass printing enhances durability and luxury perception by eliminating paper labels.. Scope note: The benefits may depend on the specific printing method and glass quality. ↩
"How to Silk Screen on Glass",
. Educational resources on printing techniques explain that silk-screen printing involves high-temperature ink fusion, resulting in a durable and tactile finish. Evidence role: mechanism; source type: education. Supports: Silk-screen printing on glass creates a raised, durable design by fusing ink at high temperatures.. Scope note: Durability may depend on the specific ink and glass type used. ↩"Hotstamping on glass for metal effects like gold or silver",
. Research on decorative techniques shows that hot stamping uses heat and pressure to bond metallic foils to glass, resulting in a high-quality finish. Evidence role: mechanism; source type: research. Supports: Hot stamping applies metallic foils to glass surfaces, creating a durable and visually striking finish.. Scope note: The process may require specialized equipment and materials. ↩"Packaging and Labeling Requirements FAQs", https://www.nist.gov/pml/owm/faqs/packaging-and-labeling-requirements-faqs. Institutional guidelines for retail packaging highlight the importance of meeting stringent standards, such as those used by Costco, to ensure product integrity during transit. Evidence role: expert_consensus; source type: institution. Supports: Costco-level inspection standards emphasize robust packaging to prevent damage during shipping.. Scope note: Specific standards may vary by retailer and product category. ↩
Keep Reading