
Getting your brand's logo onto a glass container involves more than choosing a color and sending an artwork file. The shape and surface of the glass, fine details in the design, color registration, and the selected ink system all affect the finished result.
A practical workflow for screen printing on glass covers six steps: inspect the container, prepare the artwork for its shape, control surface preparation and registration, select a suitable firing or curing route, agree on relevant quality checks, and approve the sample before production.
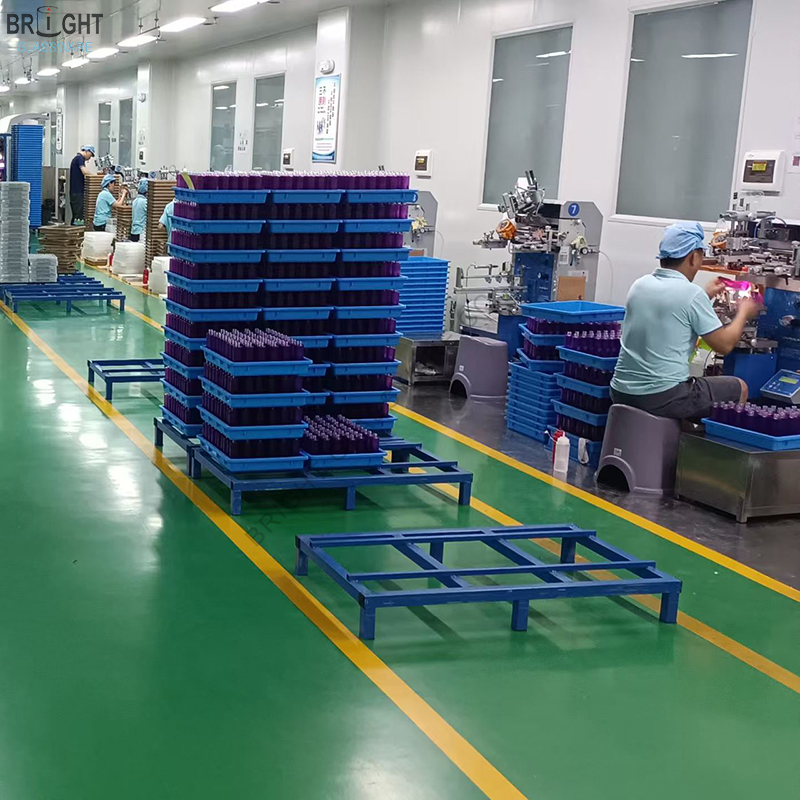
The following guide combines Bright Glassware's printing workflow with practical checks for buyers sourcing decorated candle jars, fragrance bottles, and other glass packaging.
What Should You Check on the Glass Before Screen Printing?
Start with the actual container that will be printed. A design approved on a flat screen can look different when it crosses a mold seam, sits on a curved wall, or is applied over an uneven surface.
At Bright Glassware, our initial checks focus on the roundness of the glass, visible ripples and bubbles, and the position of the mold seam relative to the proposed artwork. These checks help identify a suitable printing area before screen preparation.
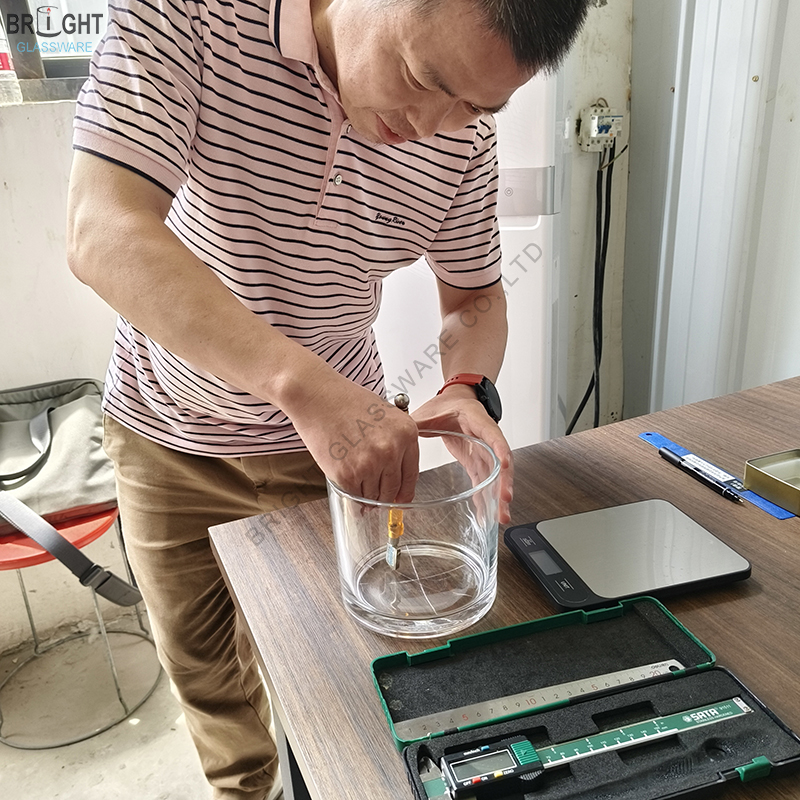
Roundness and the Printing Surface
The container's shape matters to the contact between the screen and the glass. Check the dimensions and roundness in the intended printing area, rather than relying only on the overall height or nominal capacity. The acceptable variation should be considered with the container drawing and printing setup; this article does not assign a universal tolerance to every jar or bottle.
Look closely at visible ripples, bubbles, and other irregularities near the design. Their position matters: a feature outside the decoration area may have a different effect from one directly beneath small text or a solid block of ink.
Keep the Artwork Clear of Mold Seams
We recommend positioning the artwork away from the mold seam. A raised seam can interrupt contact during printing and make a fine line or letter harder to reproduce consistently. Mark the intended print area on a drawing or sample photo so that the buyer and supplier are discussing the same location.
Before approving the layout, check the container from the front and from an angle. Confirm that the logo sits at the intended height and that the seam, shoulder, and base do not interfere with the important parts of the design.
How Should Artwork Be Prepared for Curved Glass?
Our engineering team adjusts artwork for the actual glass shape before screen preparation. The purpose is to account for the way the design transfers onto the container and appears on its curved surface. A cylindrical jar and a tapered bottle do not necessarily need the same adjustment.
Check the Design on the Actual Shape
There is no single correction that works for every curved surface. Review the proposed artwork with the container dimensions and printing area, then assess the result on a physical sample. A flat digital proof is useful for checking spelling and layout, but it cannot show every effect of curvature, glass color, or the surface finish.
For a wraparound design, identify where the artwork starts and ends. For a front-facing logo, agree on its orientation relative to any locating feature or mold seam. This gives the sample review a clear reference.
Match the Screen to Fine Lines and Solid Areas
Bright Glassware selects the screen mesh according to the distribution of fine lines, small text, and solid areas in the artwork. These elements place different demands on ink transfer, so one mesh specification should not be treated as suitable for every design.
For very small features, including details around 0.2 mm, identify the critical areas during artwork review and inspect them on the physical sample. Check whether small letters remain readable, gaps stay open, and the edges of solid areas look acceptable. Fine-detail capability still needs to be confirmed for the selected glass, ink, and design.
Before sending artwork for sample development, buyers should identify:
- The final artwork version and intended print size.
- The small text, fine lines, and negative spaces that must remain clear.
- The number of colors and the reference for each color.
- The print position, orientation, and any additional decoration such as hot stamping.
How Are Surface Preparation and Multi-Color Registration Controlled?
Bright Glassware uses a near-fully automated, dust-controlled deep-processing workshop, automated flame plasma surface treatment, and CNC servo visual positioning. These controls support surface preparation and registration; the finished sample remains the basis for checking the appearance of the design.
Flame Plasma Surface Treatment
Our automated line applies flame plasma treatment before printing. Surface treatment can improve a material's receptiveness to inks, and equipment suppliers describe flame treatment before printing or coating as a way to modify surface properties.1
The appropriate treatment depends on the actual glass or existing coating and the selected ink system. A clean-looking container alone does not establish ink compatibility. Discuss surface preparation together with the decoration route, then evaluate the completed sample under the agreed conditions.
CNC Servo Visual Positioning
For suitable containers, optical sensors detect an available bottom locating groove or color mark to help control the position of successive colors. Registration is particularly important when two or more printed colors meet, or when screen printing is combined with hot stamping.
When reviewing samples, check more than the individual colors. Look at the relative position of the layers, the overall print height, and the orientation of the design. Fine outlines and closely adjacent colors make small alignment differences easier to see. Record the acceptable appearance on the approved sample rather than assuming that automation guarantees a particular tolerance for every project.
How Do Ceramic Firing and UV Curing Differ?
Bright Glassware offers a ceramic ink firing route at approximately 600°C and a UV curing route. The choice depends on the glass, any existing surface treatment, the ink system, the intended use, and the approved appearance.
Ceramic Ink Firing
Ceramic enamels are designed for firing onto glass. Ink and enamel manufacturers offer different systems for container decoration, with processing requirements that depend on the formulation.2 For Bright Glassware's ceramic route, the reported firing temperature is approximately 600°C.
That temperature describes processing. It does not establish the finished container's service-temperature rating, candle safety, or resistance to direct flame. Scratching, cleaning, and contact with the packaged product should be assessed through checks relevant to the intended use.
UV Curing
UV inks cure using ultraviolet light. This route can be considered for vivid designs and some containers with existing color coatings, subject to compatibility between the surface, ink, and curing system. Confirm suitable surface preparation and trial the selected ink on the actual substrate.
Do not choose the route from appearance alone. A printed sample should establish whether the color, coverage, registration, and relevant resistance checks meet the project requirements. UV curing should not be assumed suitable for every coating, nor should either route be given a universal durability ranking.
Spray coating is a separate decoration step. When a logo will be printed over a color coating, evaluate the compatibility of the complete coating and ink system.
| Buyer decision | Ceramic firing | UV curing |
|---|---|---|
| How is the ink processed? | A compatible ceramic enamel is fired onto the glass. | A compatible UV ink is cured with ultraviolet light. |
| What needs checking first? | Suitability of the glass, enamel, and any existing decoration for firing. | Suitability of the actual surface, pretreatment, ink, and curing conditions. |
| How should appearance be approved? | Review color, detail, coverage, and registration on the fired sample. | Review color, detail, coverage, and registration on the cured sample. |
| How is durability assessed? | Use agreed checks for the actual decoration and intended exposure. | Use agreed checks for the actual decoration and intended exposure. |
For projects combining printing, coating, and other finishes, review the sequence of operations as part of your glass packaging customization requirements.
What Should Cross-Cut, Alcohol, and Essential Oil Checks Confirm?
Bright Glassware carries out cross-cut checks and alcohol- and essential-oil-related rubbing checks. To make the findings useful for a purchasing decision, agree on the surface being evaluated, the procedure, and the acceptance criteria before the checks are performed.
Identify the Layer Being Checked
A colored jar may have a base coating and a separate printed logo. A check on the base coating does not establish the adhesion of the logo above it. Record the layer and location being assessed, including whether cuts pass through one coating or a complete decoration system.
ISO 2409 describes a cross-cut method for assessing resistance to separation after a lattice is cut through a coating; it is not a direct measurement of adhesion strength.3 If a standard is specified in an order, agree on its applicable method and document the actual procedure. A photograph by itself cannot demonstrate compliance or justify a rating.
Define Alcohol and Essential Oil Exposure
For fragrance and cosmetic packaging, the liquid used in a check should be relevant to the product and expected contact. An alcohol solution, an essential oil, and a finished fragrance formulation are not interchangeable test liquids.
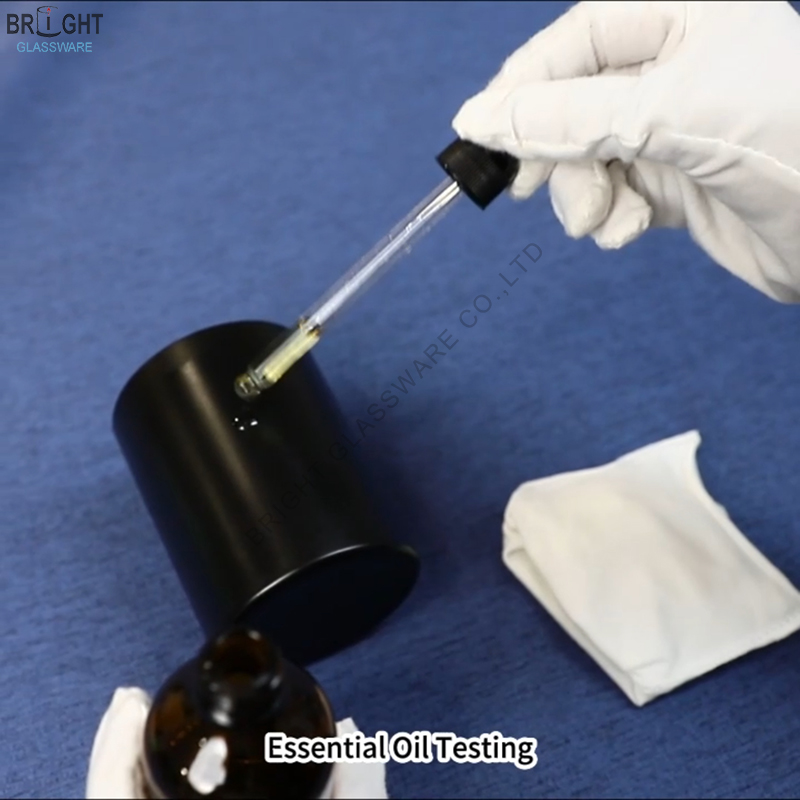
A useful test brief should record:
- Liquid: the product or reagent and its identity or concentration, where relevant.
- Method: whether the check involves contact, soaking, or rubbing, and the conditions used.
- Test area: the base coating, printed logo, or another specified part of the decoration.
- Exposure: the contact time or rubbing count, together with the agreed application method.
- Acceptance criteria: the permitted appearance changes and how color transfer, smearing, lifting, or surface damage will be assessed.
- Record: the sample identity, date, before-and-after observations, and actual result.
Use the resulting record to compare the sample with the agreed criteria. Do not infer a pass result from an attractive sample or from a photograph of the procedure alone.
Keep Container Checks Separate from Print Checks
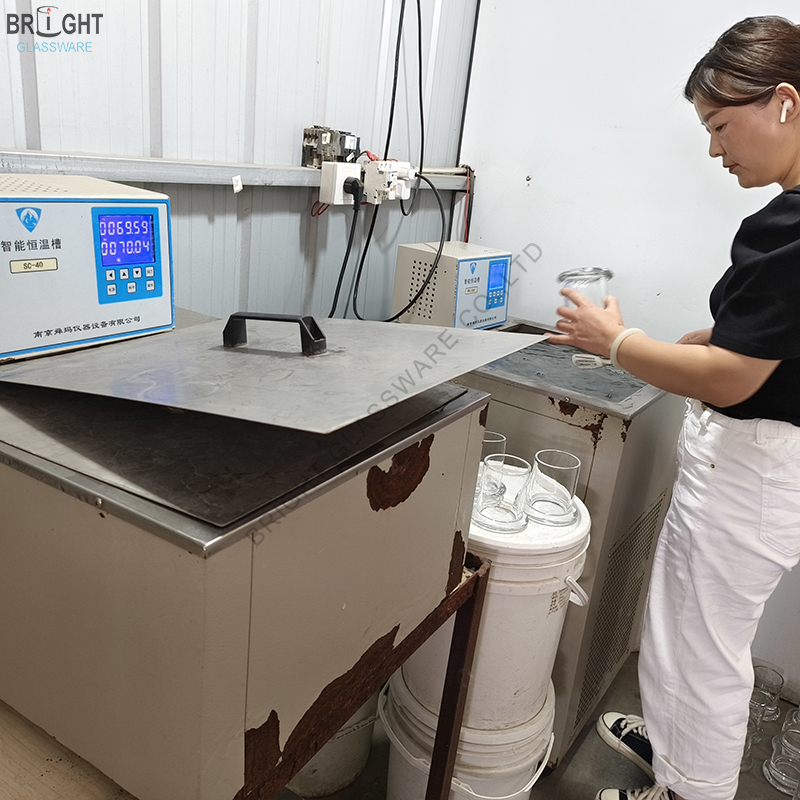
Evaluate the glass container and its printed decoration through the checks relevant to each. Where changes in temperature matter to the intended use, agree on the conditions and acceptance criteria for the container check. Keep its records alongside the decoration results; a temperature-difference check does not replace adhesion or liquid-resistance checks on the printed finish.
What Should Buyers Approve Before Production?
Bring the artwork, physical sample, and order requirements together before releasing production. The approved sample is most useful when the written specification explains which features it represents and which checks must be documented separately.
A Practical Pre-Production Approval Checklist
- Container and surface: confirm the selected jar or bottle, drawing, and any base coating or surface treatment.
- Artwork version: record the final file and intended print size, including small text and fine details.
- Color reference: agree on the reference and review the printed color on the physical container. A color code alone does not show the effect of glass color or the base coating.
- Decoration route: identify the printing method, firing or curing route, and any additional decoration.
- Print position: confirm height, orientation, relationship to the mold seam, and the alignment of multiple colors or finishes.
- Approved sample: buyer and supplier should retain matching reference samples and record their relationship to the order specification.
- Quality checks: agree on the test area, liquid, procedure, acceptance criteria, and required records.
- Packaging: confirm how decorated surfaces will be protected from contact and abrasion during packing and transport.
If a material, coating, artwork file, or decoration route changes after approval, review whether a new sample is needed. Keeping the sample reference and written specification aligned helps avoid disputes about what was actually approved.
Frequently Asked Questions
What is the minimum order quantity (MOQ) for screen printing on glass?
Request a project-specific quotation using the selected container, artwork, number of colors, and decoration route. This article does not specify a fixed MOQ; the quotation should state the quantity and setup requirements for the proposed project.
Can you screen print on a glass bottle that is already colored or frosted?
It depends on compatibility between the treated surface, the selected ink, and the processing conditions. UV curing is one available route for consideration. Confirm suitability on the actual container and review the completed sample before approving production.
How durable is screen printing on glass candle jars?
Durability depends on the surface, ink system, processing conditions, and intended exposure. Agree on relevant adhesion and resistance checks and review the actual results. A ceramic firing temperature is not a candle-use safety rating, and decoration checks do not replace evaluation of the finished candle system.
What should I send when requesting a screen-printing sample?
Provide the container drawing or reference, current artwork file, intended print size and position, color references, and any existing surface finish. Explain the intended use and the liquids or handling conditions the decoration may encounter. Identify the fine details and alignment requirements that matter most to the design.
Conclusion
Successful screen printing on glass starts with a suitable container and ends with a clearly approved sample and relevant quality records. Review the glass surface, prepare artwork for the actual shape, check registration, choose a compatible processing route, and define what the finished decoration needs to withstand.
Contact Bright Glassware to discuss your container, artwork, decoration route, and sample approval requirements. Sharing these details at the start gives the project a clearer basis for sampling and quotation.
Rapidflame: Flame Plasma Surface Treatment. General background on surface treatment before printing and coating. ↩
Vibrantz: Glass Colors and Materials. Manufacturer information on glass decoration materials; individual systems have their own processing requirements. ↩
ISO 2409:2020: Paints and varnishes — Cross-cut test. Official scope and limitations of the cross-cut method. ↩
Keep Reading